Wednesday, October 24, 2012

How To Create Wordpress Subscription Form?


This Widget Was Created by
It's a long time since we last released a widget. The widget today is really a useful one. It is a smart container which displays the total number of subscribers, contains RSS link, Facebook link and Twitter link. It also contains a beautiful subscription form where visitors can submit there emails to receive free website updates. This Widget is made Compatible to work with all browsers especially with IE8.
I named it Wordpress Subscription Form because you might have seen such widgets on every Wordpress blog and Blogger lacks it.

How To Create Wordpress Subscription Form?

The steps are made really simple. Follow these,
  1. Go To Blogger > Design
  2. Select an HTML/JavaScript Widget
  3. Paste the code below into the widget

<style>.mbtbar{width: 100%; float: left;}.mbtbar .count{color:#333; font-size: 14px; font-weight: bold; font-family: Helvetica, Arial; background: #fff; height: 45px; line-height: 45px; vertical-align: middle; width: 100%; padding: 0 10px 0 4px;}.mbtbar .count span.bigcount{color:#F17C18; font-size: 24px; font-family: Helvetica, Arial; line-height: 39px; vertical-align: top; padding-right:3px;}.mbtbar .subicons{border-bottom: 1px solid #e6e6e6; margin: 0px 0 0px 0; float: left; width: 300px; font-family: Helvetica, Arial; font-size: 14px;} .mbtbar .subicons a{text-decoration: none; color:#333333;} .mbtbar .subicons a:hover{text-decoration: underline; color:#333333;}.mbtbar .subicons .rssicon{border-right: 1px solid #e6e6e6; background: url(https://blogger.googleusercontent.com/img/b/R29vZ2xl/AVvXsEiP6GAIXtfcciqSIA_bw12Q6YXmYKrdGHceftVHc0SX-SeaGQC5j3WL7iwaaEaVpregH6lwKRXDjjEro2UM1vshLcsfSaQpBskppL0fW0nWhlOidbzJb764hKFtS9n5nireT33mXGMgLDE/s400/rss.png) no-repeat left center; min-width: 20px; height: 48px; line-height: 57px; vertical-align: middle; float: left; padding: 0px 20px 0px 30px; margin: 0 0 0 5px;}.mbtbar .subicons .fbicon{border-right: 1px solid #e6e6e6; background: url(https://blogger.googleusercontent.com/img/b/R29vZ2xl/AVvXsEjmOLrS2Q-fuhlq66zeDjlfRKsTRtrmctE5ktbUBh0Rf3KhxC_RB0OUyj2rgonc4yB52c_oVawBmg7GWg50jxpBIFoFjiBtW_-GWOga8-sdWypnyMs92aLJJg6Da6o9WZyBNR_3-_mQRE8/s400/facebook.png) no-repeat left center; min-width: 20px; height: 48px; line-height: 57px; vertical-align: middle; float: left; padding: 0px 20px 0px 30px; margin: 0 0 0 5px;}.mbtbar .subicons .twittericon{background: url(https://blogger.googleusercontent.com/img/b/R29vZ2xl/AVvXsEjKl-_RSezq6078h4TEou9DIWR6epWMToKTtdhXwOiUURkuWc4kK9pyJfM-RGa5dleRifmq6an4zG1rURP0Rugb82xxHOvj57_AaR1LMZMFSX6yi4gBKdNEGTbs2qSXhQgawuZ3k1d71V0/s400/twitter.png) no-repeat left center; min-width: 20px; height: 48px; line-height: 57px; vertical-align: middle; float: left; padding: 0px 20px 0px 30px; margin: 0 0 0 5px;}.mbtbar .emailsub{border-bottom: 1px solid #e6e6e6; padding: 15px 0 20px 0; float: left; width: 100%; font-family: Helvetica, Arial;}.mbtbar .emailsub .emailicon{background: url(https://blogger.googleusercontent.com/img/b/R29vZ2xl/AVvXsEilr3S4O-h-Bd5KS51jP-7sRecGesOMHlhV2f22z0kmbH9jxDKNrzCGzmUPWW8OgbYVSuuGggaajfKVzijim052Y-51thERsArrXaOf9Sec0vXhLx8abe8rnHfBzdpP6V2p9tHVPcblls0/s400/email.png) no-repeat left center; float: left; padding: 5px 15px 0px 35px; margin: 0 0 0 5px; width: 300px; height: 28px; line-height: 28px; vertical-align: middle; font-size: 14px; color: #333; }.mbtbar .emailsub .emailupdatesform{margin: 15px 0 5px 5px; width: 300px; float: left;}.mbtbar .emailsub .emailupdatesform input.emailupdatesinput{background: #fff !important; float: left; border: 1px solid #d2d2d2; padding: 0px 8px 0px 8px; color: #a19999; font-size: 12px; height: 25px; width: 200px; -moz-border-radius: 5px; -webkit-border-radius: 5px;}.mbtbar .emailsub .emailupdatesform input.joinemailupdates{background:-moz-linear-gradient(top,#57ABFE  0%,#0080ff  100%); background:-webkit-gradient(linear,left top,left bottom,from(#57ABFE ),to(#0080ff )); border: 1px solid #0080ff ; text-transform: uppercase; color: #fff; height: 25px; padding: 0 12px 0 12px; margin: 0 0 0 5px; -moz-border-radius: 5px; -webkit-border-radius: 5px;} </style><!--[if IE 7]> <style> .mbtbar .count span.bigcount{color:#F17C18; font-size: 24px; font-family: Helvetica, Arial; line-height: 34px; vertical-align: middle; }.mbtbar .emailsub .emailupdatesform input.joinemailupdates{background:#0080ff ; border: 1px solid #0080ff ; text-transform: uppercase; color: #ffffff; font-weight:bold; height: 25px; padding: 0 12px 0 12px; margin: 0 0 0 5px; } </style> <![endif]--><div class="mbtbar"><div class="count">Join <span class="bigcount">feed count </span> People Following blogg-tricks</div><div class="subicons"><div class="rssicon"><a href="http://www.blogg-tricks.com/feeds/posts/default " target="_blank">RSS</a></div><div class="fbicon"><a href="http://www.facebook.com/p.harieksh " target="_blank" rel="nofollow">Facebook</a></div><div class="twittericon"><a href="http://twitter.com/harikesh409 " target="_blank" rel="nofollow">Twitter</a></div></div> <div class="emailsub"> <div class="emailicon">Stay Updated via Email Newsletter</div> <div class="emailupdatesform"> <form action="http://feedburner.google.com/fb/a/mailverify" method="post" target="popupwindow" onsubmit="window.open('http://feedburner.google.com/fb/a/mailverify?uri=blogg-tricks ', 'popupwindow', 'scrollbars=yes,width=550,height=520');return true"><input gtbfieldid="10" class="emailupdatesinput" name="email" value="Enter your email..." onblur="if (this.value == &#39;&#39;) {this.value = &#39;Enter your email...&#39;;}" onfocus="if (this.value == &#39;Enter your email...&#39;) {this.value = &#39;&#39;;}" type="text" /><input value="blog-tricks " name="uri" type="hidden" /><input value="Join" class="joinemailupdates" type="submit" /></form></div></div></div>
   4.  Save the widget and you are done! 

How To Style and Edit the Widget?

 Follow these,
  • To Change the the Blue Colour of the Submit button Change #57ABFE to a Light shade and this #0080ff to a dark shade. Our Colour Generator Can help in this case.
  • Replace feed count with your Feed count and always update it manually once a week. To change its colour edit this #F17C18 
  • Replace http://www.blogg-tricks.com/feeds/posts/default with your feedburner RSS Feed link.
  • Replace http://www.facebook.com/p.harieksh with your Facebook profile  Link
  • Replace http://twitter.com/harikesh409 with your twitter profile link
  • Replace http://feedburner.google.com/fb/a/mailverify?uri=blogg-trickswith your feedburner RSS Email Link
  • Replace blogg-tricks with the Feedburner RSS Email Title which is always written at the end of your FEED Email Link as shown below,
http://feedburner.google.com/fb/a/mailverify?uri=blogg-tricks  

I would be really pleased to hear about your suggestions and feedback. If you faced any trouble then do not panic and let me know :>


Create a Simple "Tree Menu" in Blogger

Ever wondered to create an expandable Tree menu in a simple one step method? There we have it today! A Tree Menu is different from other navigation menus that we have released so far. It has has branches and sub-branches. You can add links to it or even simple text and hang it on your blog sidebar. It helps to organize data in a hierarchal method. Most often we use tree menus for displaying blog archives. It contains a Expand and Contract Link that collapses and shrinks the tree branches. So lets add this beautiful menu to blogger blogs in easiest possible way.

  1. Go to blogger > Design
  2. Choose HTML/JavaScript widget
  3. Paste the following code inside it,
<style>
.treeview ul{
margin: 0px;
padding: 0;
}
.treeview li{
background: white url(https://blogger.googleusercontent.com/img/b/R29vZ2xl/AVvXsEje7z4mv-gHWLueN8PwMCJWR79IxQCACLOkmRB-386t-lNjJRtiW_v3Sr89xca9y6-4GzFUsHhpLZ-u7W_-t_hLBE0Sfx_Gdg_5q9dLyA6XPQJpe3qFk50Qa7arUMFHAaGOti_vYlP351Q/s400/list.gif) no-repeat 0px 3px;
list-style-type: none;
padding-left: 32px;
margin-bottom: 3px;
}
.treeview li.submenu{
background: white url(https://blogger.googleusercontent.com/img/b/R29vZ2xl/AVvXsEgAtclm3hFRboxfifolLk7MKUW8rEnqSfTUtswugkRD0FUkOS3xuFgGj-cYbqr6N5k-gqzklwUVbUdkcvtXQb80CVewlBykdi5sIzsK2SI3qbrCyFAzOu5o2-9EsEEoSUi8pAGX_kyMRJk/s400/closed.gif) no-repeat  0px 3px;
cursor: hand !important;
cursor: pointer !important;
}

.treeview li.submenu ul{
display: none;
}
.treeview .submenu ul li{
cursor: default;
}
</style>

<script type="text/javascript" >
var persisteduls=new Object()
var ddtreemenu=new Object()
ddtreemenu.closefolder="https://blogger.googleusercontent.com/img/b/R29vZ2xl/AVvXsEgAtclm3hFRboxfifolLk7MKUW8rEnqSfTUtswugkRD0FUkOS3xuFgGj-cYbqr6N5k-gqzklwUVbUdkcvtXQb80CVewlBykdi5sIzsK2SI3qbrCyFAzOu5o2-9EsEEoSUi8pAGX_kyMRJk/s400/closed.gif" //set image path to "closed" folder image
ddtreemenu.openfolder="https://blogger.googleusercontent.com/img/b/R29vZ2xl/AVvXsEix84rjaYWfTCVTkJw96H_A0IAwJk0FMbCwZnNVdwER_48ZB-Eada8fypS3O257Wg7hyk9_m05KyXtdWfGlGwO7g0cpPgYqkJYvPVJD3-4dK5WYYDcC6636fe0LOayKdajT_5rPxEmhMpQ/s400/open.gif" //set image path to "open" folder image
//////////No need to edit beyond here///////////////////////////
ddtreemenu.createTree=function(treeid, enablepersist, persistdays){
var ultags=document.getElementById(treeid).getElementsByTagName("ul")
if (typeof persisteduls[treeid]=="undefined")
persisteduls[treeid]=(enablepersist==true && ddtreemenu.getCookie(treeid)!="")? ddtreemenu.getCookie(treeid).split(",") : ""
for (var i=0; i<ultags.length; i++)
ddtreemenu.buildSubTree(treeid, ultags[i], i)
if (enablepersist==true){ //if enable persist feature
var durationdays=(typeof persistdays=="undefined")? 1 : parseInt(persistdays)
ddtreemenu.dotask(window, function(){ddtreemenu.rememberstate(treeid, durationdays)}, "unload") //save opened UL indexes on body unload
}
}
ddtreemenu.buildSubTree=function(treeid, ulelement, index){
ulelement.parentNode.className="submenu"
if (typeof persisteduls[treeid]=="object"){ //if cookie exists (persisteduls[treeid] is an array versus "" string)
if (ddtreemenu.searcharray(persisteduls[treeid], index)){
ulelement.setAttribute("rel", "open")
ulelement.style.display="block"
ulelement.parentNode.style.backgroundImage="url("+ddtreemenu.openfolder+")"
}
else
ulelement.setAttribute("rel", "closed")
} //end cookie persist code
else if (ulelement.getAttribute("rel")==null || ulelement.getAttribute("rel")==false) //if no cookie and UL has NO rel attribute explicted added by user
ulelement.setAttribute("rel", "closed")
else if (ulelement.getAttribute("rel")=="open") //else if no cookie and this UL has an explicit rel value of "open"
ddtreemenu.expandSubTree(treeid, ulelement) //expand this UL plus all parent ULs (so the most inner UL is revealed!)
ulelement.parentNode.onclick=function(e){
var submenu=this.getElementsByTagName("ul")[0]
if (submenu.getAttribute("rel")=="closed"){
submenu.style.display="block"
submenu.setAttribute("rel", "open")
ulelement.parentNode.style.backgroundImage="url("+ddtreemenu.openfolder+")"
}
else if (submenu.getAttribute("rel")=="open"){
submenu.style.display="none"
submenu.setAttribute("rel", "closed")
ulelement.parentNode.style.backgroundImage="url("+ddtreemenu.closefolder+")"
}
ddtreemenu.preventpropagate(e)
}
ulelement.onclick=function(e){
ddtreemenu.preventpropagate(e)
}
}
ddtreemenu.expandSubTree=function(treeid, ulelement){ //expand a UL element and any of its parent ULs
var rootnode=document.getElementById(treeid)
var currentnode=ulelement
currentnode.style.display="block"
currentnode.parentNode.style.backgroundImage="url("+ddtreemenu.openfolder+")"
while (currentnode!=rootnode){
if (currentnode.tagName=="UL"){ //if parent node is a UL, expand it too
currentnode.style.display="block"
currentnode.setAttribute("rel", "open") //indicate it's open
currentnode.parentNode.style.backgroundImage="url("+ddtreemenu.openfolder+")"
}
currentnode=currentnode.parentNode
}
}
ddtreemenu.flatten=function(treeid, action){ //expand or contract all UL elements
var ultags=document.getElementById(treeid).getElementsByTagName("ul")
for (var i=0; i<ultags.length; i++){
ultags[i].style.display=(action=="expand")? "block" : "none"
var relvalue=(action=="expand")? "open" : "closed"
ultags[i].setAttribute("rel", relvalue)
ultags[i].parentNode.style.backgroundImage=(action=="expand")? "url("+ddtreemenu.openfolder+")" : "url("+ddtreemenu.closefolder+")"
}
}
ddtreemenu.rememberstate=function(treeid, durationdays){ //store index of opened ULs relative to other ULs in Tree into cookie
var ultags=document.getElementById(treeid).getElementsByTagName("ul")
var openuls=new Array()
for (var i=0; i<ultags.length; i++){
if (ultags[i].getAttribute("rel")=="open")
openuls[openuls.length]=i //save the index of the opened UL (relative to the entire list of ULs) as an array element
}
if (openuls.length==0) //if there are no opened ULs to save/persist
openuls[0]="none open" //set array value to string to simply indicate all ULs should persist with state being closed
ddtreemenu.setCookie(treeid, openuls.join(","), durationdays) //populate cookie with value treeid=1,2,3 etc (where 1,2... are the indexes of the opened ULs)
}
////A few utility functions below//////////////////////
ddtreemenu.getCookie=function(Name){ //get cookie value
var re=new RegExp(Name+"=[^;]+", "i"); //construct RE to search for target name/value pair
if (document.cookie.match(re)) //if cookie found
return document.cookie.match(re)[0].split("=")[1] //return its value
return ""
}
ddtreemenu.setCookie=function(name, value, days){ //set cookei value
var expireDate = new Date()
//set "expstring" to either future or past date, to set or delete cookie, respectively
var expstring=expireDate.setDate(expireDate.getDate()+parseInt(days))
document.cookie = name+"="+value+"; expires="+expireDate.toGMTString()+"; path=/";
}
ddtreemenu.searcharray=function(thearray, value){ //searches an array for the entered value. If found, delete value from array
var isfound=false
for (var i=0; i<thearray.length; i++){
if (thearray[i]==value){
isfound=true
thearray.shift() //delete this element from array for efficiency sake
break
}
}
return isfound
}
ddtreemenu.preventpropagate=function(e){ //prevent action from bubbling upwards
if (typeof e!="undefined")
e.stopPropagation()
else
event.cancelBubble=true
}
ddtreemenu.dotask=function(target, functionref, tasktype){ //assign a function to execute to an event handler (ie: onunload)
var tasktype=(window.addEventListener)? tasktype : "on"+tasktype
if (target.addEventListener)
target.addEventListener(tasktype, functionref, false)
else if (target.attachEvent)
target.attachEvent(tasktype, functionref)
}
</script>


<a href="javascript:ddtreemenu.flatten('treemenu1', 'expand')">Expand  +</a> | <a href="javascript:ddtreemenu.flatten('treemenu1', 'contact')">- Contract</a>
<p></p>
<ul id="treemenu1" class="treeview">
<li><a href="#">Item 1</a></li>
<li><a href="#">Item 2</a></li>

<li>Folder 1
    <ul>
    <li><a href="#">Sub Item 1.1</a></li>
    <li><a href="#">Sub Item 1.2</a></li>
    </ul>
</li>
<li><a href="#">Item 3</a></li>

<li>Folder 2
    <ul>
    <li><a href="#">Sub Item 2.1</a></li>
    <li>Folder 2.1
        <ul>
        <li><a href="#">Sub Item 2.1.1</a></li>
        <li><a href="#">Sub Item 2.1.2</a></li>
        </ul>
    </li>
</ul>
</li>

<li><a href="#">Item 4</a></li> </ul>

<script type="text/javascript">
//ddtreemenu.createTree(treeid, enablepersist, opt_persist_in_days (default is 1))
ddtreemenu.createTree("treemenu1", true)
ddtreemenu.createTree("treemenu2", false)
</script>

The yellow part is our concerned code of study:
  • Replace # with Link's URL
  • Replace Item 1, 2 ,3 with your Link Title text
  • To add a new link simple add the following code just above </ul>
<li><a href="#">Item 5</a></li>
  • To create a sub menu then add this code just above </ul>
<li>Main title 
    <ul>
    <li><a href="#">Sub title 1</a></li>
    <li><a href="#">Sub title 2</a></li> 

<li><a href="#">Sub title 3</a></li> 
    </ul>
</li>

Just remember that a link line starts with <li> and ends with </li> tag.

    4.   Save your widget and you are all done!

Visit your blog and see a drop down Tree Menu handing on your sidebar. If you faced any difficulty or if you want any help in creating more menus and sub menus then please do not hesitate to leave your comment. I hope this proves helpful for most of you. Peace out buddies! :)

CSS3 Multi-Level Drop Down Menu


It is always fun to learn and explore the new standards introduced for CSS. With growing development in HTML5 and CSS3, heavy scripts and flash tools are pushed back. This Mac-like multi-level drop down menu that we will learn to create and how to add it to Blogger is solely based on Pure CSS3 with no jquery used at all! It uses simple box-shadow, text-shadow and border-radius properties. It is compatible with all major browsers like FireFox, Chrome and Safari. Since IE7+  always lack compatibility with CSS3 therefore only the rounded borders will not render in IE7. I have kept the installation extremely easy. You just need to copy and paste the code. This Menu  is provided by webDesignerWall guys and it is widgetized and made compatible with Blogspot blog platform by MBT.

Add multi-level drop down menu To Blogger

  1. Go To Blogger > Design
  2. Choose a HTML/JavaScript gadget
  3. Paste the giant code below inside it,
<style>
#MBT-Container {
    font: normal 1em Arial, Helvetica, sans-serif;
     width:100%; float:left;   
}
a {
    color: #333;
}
#nav {
margin: 0;
    padding: 7px 6px 0;
    background: #0080ff url(https://blogger.googleusercontent.com/img/b/R29vZ2xl/AVvXsEhAPFQrINsTzkIdeitOuuGK46M0XUKLauj4Tnlq33cBiM8w902IdMU4Uubr1qI26dbUTG-A3lDXslQimrp0X7SbXNIhVIwXHMH8tML0cs1GxEXtJPfZha-io-Z_4fTJ8HYciAtKysmWXno/s1600/gradient.png) repeat-x 0 -110px;
    line-height: 100%;
    border-radius: 2em;
    -webkit-border-radius: 2em;
    -moz-border-radius: 2em;
    -webkit-box-shadow: 0 1px 3px rgba(0,0,0, .4);
    -moz-box-shadow: 0 1px 3px rgba(0,0,0, .4);
}
#nav li {
    margin: 0 5px;
    padding: 0 0 8px;
    float: left;
    position: relative;
    list-style: none; }

/* main level link */
#nav a {
    font-weight: bold;
    color: #e7e5e5;
    text-decoration: none;
    display: block;
    padding:  8px 20px;
    margin: 0;
    -webkit-border-radius: 1.6em;
    -moz-border-radius: 1.6em;
   
    text-shadow: 0 1px 1px rgba(0,0,0, .3);
}
#nav a:hover {
    background: #000;
    color: #fff;
}
/* main level link hover */
#nav .current a, #nav li:hover > a {
    background: #666 url(https://blogger.googleusercontent.com/img/b/R29vZ2xl/AVvXsEhAPFQrINsTzkIdeitOuuGK46M0XUKLauj4Tnlq33cBiM8w902IdMU4Uubr1qI26dbUTG-A3lDXslQimrp0X7SbXNIhVIwXHMH8tML0cs1GxEXtJPfZha-io-Z_4fTJ8HYciAtKysmWXno/s1600/gradient.png) repeat-x 0 -40px;
    color: #444;
    border-top: solid 1px #f8f8f8;
    -webkit-box-shadow: 0 1px 1px rgba(0,0,0, .2);
    -moz-box-shadow: 0 1px 1px rgba(0,0,0, .2);
    box-shadow: 0 1px 1px rgba(0,0,0, .2);
    text-shadow: 0 1px 0 rgba(255,255,255, 1);
}
/* sub levels link hover */
#nav ul li:hover a, #nav li:hover li a {
    background: none;
    border: none;
    color: #666;
    -webkit-box-shadow: none;
    -moz-box-shadow: none;
}
#nav ul a:hover {
    background: #0080ff url(https://blogger.googleusercontent.com/img/b/R29vZ2xl/AVvXsEhAPFQrINsTzkIdeitOuuGK46M0XUKLauj4Tnlq33cBiM8w902IdMU4Uubr1qI26dbUTG-A3lDXslQimrp0X7SbXNIhVIwXHMH8tML0cs1GxEXtJPfZha-io-Z_4fTJ8HYciAtKysmWXno/s1600/gradient.png) repeat-x 0 -100px !important;
    color: #fff !important;
text-align:left;
    -webkit-border-radius: 0;
    -moz-border-radius: 0;
    text-shadow: 0 1px 1px rgba(0,0,0, .1);
}
/* dropdown */
#nav li:hover > ul {
    display: block;
}
/* level 2 list */
#nav ul {
    display: none;
text-align:left;
    margin: 0;
    padding: 0;
    width: 185px;
    position: absolute;
    top: 35px;
    left: 0;
    background: #ddd url(https://blogger.googleusercontent.com/img/b/R29vZ2xl/AVvXsEhAPFQrINsTzkIdeitOuuGK46M0XUKLauj4Tnlq33cBiM8w902IdMU4Uubr1qI26dbUTG-A3lDXslQimrp0X7SbXNIhVIwXHMH8tML0cs1GxEXtJPfZha-io-Z_4fTJ8HYciAtKysmWXno/s1600/gradient.png) repeat-x 0 0;
    border: solid 1px #b4b4b4;
    -webkit-border-radius: 10px;
    -moz-border-radius: 10px;
    border-radius: 10px;
    -webkit-box-shadow: 0 1px 3px rgba(0,0,0, .3);
    -moz-box-shadow: 0 1px 3px rgba(0,0,0, .3);
    box-shadow: 0 1px 3px rgba(0,0,0, .3);
}
#nav ul li {
    float: none;
    margin: 0;
    padding: 0;
}
#nav ul a {
    font-weight: normal;
    text-shadow: 0 1px 0 #fff;
}
/* level 3+ list */
#nav ul ul {
    left: 181px;
    top: -3px;
}
/* rounded corners of first and last link */
#nav ul li:first-child > a {
    -webkit-border-top-left-radius: 9px;
    -moz-border-radius-topleft: 9px;
    -webkit-border-top-right-radius: 9px;
    -moz-border-radius-topright: 9px;
}
#nav ul li:last-child > a {
    -webkit-border-bottom-left-radius: 9px;
    -moz-border-radius-bottomleft: 9px;
    -webkit-border-bottom-right-radius: 9px;
    -moz-border-radius-bottomright: 9px;
}
/* clearfix */
#nav:after {
    content: ".";
    display: block;
    clear: both;
    visibility: hidden;
    line-height: 0;
    height: 0;
}
#nav {
    display: inline-block;
}
</style>

<div id="MBT-Container">
<ul id="nav">
<li class="current"><a href="#">Home</a></li>
<li><a href="#">Blogger Tricks</a>
<ul>
<li><a href="#">Sub-Row</a>
<ul>
<li><a href="#">Sub Sub-Row 1
<li><a href="#">Sub Sub-Row 1</a></li>
</a></li></ul>
</li>
<li><a href="#">Sub-Row</a>
<ul>
               
<li><a href="#">Sub Sub-Row 2</a></li>
</ul>
</li>
<li><a href="#">Sub-Row</a></li>
</ul>
</li>

<li><a href="#">Multi-Levels</a>
<ul>
<li><a href="#">Team</a>
<ul>
<li><a href="#">Sub-Level Item 1</a></li>
<li><a href="#">Sub-Level Item 1</a>
<ul>
<li><a href="#">Sub-Level Item 11</a></li>
<li><a href="#">Sub-Level Item 22</a></li>
<li><a href="#">Sub-Level Item 33</a></li>
</ul>
</li>
                   
<li><a href="#">Sub-Level Item 1</a></li>
</ul>
</li>
<li><a href="#">Sales</a></li>
<li><a href="#">Another Link</a></li>
<li><a href="#">Department</a>
<ul>
<li><a href="#">Sub-Level Item 2</a></li>
</ul>
</li>
</ul>
</li><li><a href="#">Sitemap</a></li>   
<li><a href="#">Services</a></li>
<li><a href="#">Contact Us</a></li>
<li><a href="#">About Us</a></li>
<li><a href="#">Create This »</a></li>

</ul></div>
<br/>
The best part about this menu is that you can give it any colour you want because here we are using a transparent gradient image which can take any colour you want. Like:
 Now kindly make these customization changes:

  • Each TAB can be edited by understanding the following simple HTML code,
<li><a href="#">TAB TEXT</a></li>
In each case replace the hash sign (#) with your page URL/link and replace the text with your page title. I have kept the page titles unchanged in the code above so that you could easily edit them by seeing the demo.
  • To change the color of the menu simply replace #0080ff with a colour of your choice. You may use our Color Generator tool
 That's it! Save your widget and see the magic right in your blogs! :)

Egg Shell Slide Open Bookmarking Widget for blogger

Every webmaster fights daily to increase web traffic and more subscriptions via social media sites. But attracting visitors/readers is difficult task for webmaster. Maintain quality of content with attractive widget to retain long time on blog a different type or innovative or stylish widget is necessary for blog/websites. In the earlier post we share you “Slide out Open Heart Bookmarking Widget for Blogger”.
Here in this article we share you the same type of “Slide out Widget” in Egg shell, which is stylish, hover, oval shape contains bookmarking button like, Google plus, Twitter, Facebook, Linkedin, Stumble upon, Email subscription, blogger, in single egg shell. Let’s begin the tutorials for adding “Egg shell Bookmarking widget” for blogger.


How to Add “Slide Out Bookmarking widget in Egg shell”?

  • Sign into your blogger account
  • Click on “Template” link tab (In the new blogger interface)
  • Tick on “Expand Widget Template” box
  • Now search for code
</head>
  • After finding the code copy the below code and paste above to it.
<script src='http://w.sharethis.com/gallery/shareegg/shareegg.js' type='text/javascript'/><script src='http://w.sharethis.com/button/buttons.js' type='text/javascript'/><script type='text/javascript'>stLight.options({publisher: &quot;bea50586-2b9f-448d-947a-01385f28e305&quot;, onhover:false}); </script><link href='http://w.sharethis.com/gallery/shareegg/shareegg.css' media='screen' rel='stylesheet' type='text/css'/>

  • After pasting the above code now search for code
</body>
  • After finding the code copy the below code and paste above to it
<div style='position: fixed; bottom: 2%; left: 2%;'><div class='shareEgg' id='shareThisShareEgg'/></div><script type='text/javascript'>stlib.shareEgg.createEgg(&#39;shareThisShareEgg&#39;, [&#39;facebook&#39;,&#39;twitter&#39;,&#39;googleplus&#39;,&#39;linkedin&#39;,&#39;blogger&#39;,&#39;stumbleupon&#39;,&#39;sharethis&#39;], {title:&#39; <data:blog.pageTitle/>&#39;,url:&#39;<data:blog.url/>&#39;,theme:&#39;shareegg&#39;});</script><a href="http://www.blogtariff.com/">Blogger Gadgets</a>
  • Now “Save Your Blog Template” and Preview your experiment.
You can enjoy and entertain your blog visitors by adding this widget.

Subscription Widget for blogger

Subscription box with Fully Wooden Theme

  • Go to Blogger Dashboard
  • Go to Layout 
  • Select Add a Gadget
  • You can type title any
  • And Copy the following code in the content.

Demo of Fully Wooden Theme


Important: If you don't want Mouse over effect of Images in the Subscription box, please delete the RED highlighted code,. If you want then leave it there. 

<style type="text/css">
 /* Delete form Here*/ 
img.beintouch:hover {
    background: none repeat scroll 0 0 #D6D6D6;
    border-radius: 16px 16px 16px 16px;
    box-shadow: 0 0 10px #565656;
}
/* Delete to Here*/
.emailtext {
    background: url("https://blogger.googleusercontent.com/img/b/R29vZ2xl/AVvXsEjYOH8vzYu5WzCTq_eDR_FY2P96A-RjS0gHX4yWiHV6Js40weA_ZYiKR7GE_Fokx2zV-CgyvhXyvoJzXBfyTptIcjcafslmnlGPUXtNRroi1l541Cd4J_nmjlga8MdGlb6sOvuaOr8It_0/s1600/mailbox.png") no-repeat scroll 4px center transparent;
    border: 1px solid #7E4E27;
    border-radius: 4px 4px 4px 4px;
    box-shadow: 1px 1px 4px #7E4E27 inset;
    color: #444444;
    font-weight: bold;
    margin-left: 2px;
    padding: 7px 15px 7px 35px;
    text-decoration: none;
    width: 176px;
}
.ebutton {
    background: -moz-linear-gradient(-45deg, #3C1F0E 0%, #D28A47 30%, #F9E183 30%, #D28A47 55%, #3C1F0E 100%) repeat scroll 0 0 transparent;
    border: 1px solid #D3D3D3;
    border-radius: 4px 4px 4px 4px;
    color: #FFFFFF;
    cursor: pointer;
    font-weight: bold;
    margin-left: -18px;
    margin-top: 5px;
    padding: 6px 15px;
    text-decoration: none;
    text-shadow: 1px 1px 0 #000000;
}
</style>
<table align="center" width="317px" cellspacing="0px" cellpadding="1px"><tbody><tr><td><a target="_blank" rel="nofollow" href="facebook fan page url"><img src="https://blogger.googleusercontent.com/img/b/R29vZ2xl/AVvXsEhCG-lVZmA1uWsf8MAZMIwD7rML3r3JGMFjQiFd3pcPrpHJfzWax7q8nS6tP8l2AlSLV9mL5P1zw9vzkHQjSHyRfvIxWMCh1AePtBYr-RwgUMUcVaIvoWR8wybzzRbr3lIRu4hZUHPUzH0/s1600/woden+board+facebook_netoops.png" class="beintouch" /></a></td><td><a target="_blank" href="twitter url" rel="nofollow"><img src="https://blogger.googleusercontent.com/img/b/R29vZ2xl/AVvXsEhRKSZUrKBoJ2XVq4nzMb8qYsocfCt2umvzy7hmezmyeBstcqrJBQLFqoRUYohCLkFA1hzCFHq6yGhIqXtlvK7rpo57t5d0dQUqpg-Z7p9R0mmAW3SpHOZhHqtAtzTklOMO3GO3Tyu2_yo/s1600/woden+board+twitter_netoops.png" class="beintouch" /></a></td><td><a target="_blank" href="feedburner link" rel="nofollow"><img src="https://blogger.googleusercontent.com/img/b/R29vZ2xl/AVvXsEjlTTdiD6qFZWSd8gGyAn2zGAv_yU_hV3IRS3MQcF35i29xWHQQiVPJEE7Aj_-r7r_5En4U5rPQcLfElW0q1700ER_lhemXHitBGtpU3ybRFWuAKnPvYSxKWuvSpLrpeRJVPFiurvWtZeo/s1600/woden+board+RSS1_netoops.png" class="beintouch" /></a><a href="http://netoopsblog.blogspot.com"></a></td></tr></tbody></table>
<div>Get Latest Tips via e-mail</div>
<form target="popupwindow" style="margin: 0pt;" onsubmit="window.open('http://feedburner.google.com/fb/a/mailverify?uri=feed burner id', 'popupwindow', 'scrollbars=yes,width=550,height=520');return true" method="post" class="emailform" action="http://feedburner.google.com/fb/a/mailverify">
<input type="hidden" value="NetOopsBloggerTricks" name="uri" />
<input type="hidden" value="en_US" name="loc" />
<input type="text" value="Enter your email..." onfocus="if (this.value == &quot;Enter your email...&quot;) {this.value = &quot;&quot;}" onblur="if (this.value == &quot;&quot;) {this.value = &quot;Enter your email...&quot;;}" name="email" class="emailtext" />
<input type="submit" value="Subscribe" title="" class="ebutton" alt="" />
</form>
Change the BLUE highlighted code with FACEBOOK PAGE URL, TWTTER, FEED URL, FEED ID respectively. 

Subscription box with Default Basic Wooden theme

  • Go to Layout 
  • Select Add a Gadget
 Important: If you don't want Mouse over effect of Images in the Subscription box, please delete the RED highlighted code,. If you want then leave it there.
<style type="text/css">
 /* Delete form Here*/ 

img.beintouch:hover {
    background: none repeat scroll 0 0 #D6D6D6;
    border-radius: 16px 16px 16px 16px;
    box-shadow: 0 0 10px #565656;
}
/* Delete to Here*/
</style>
<table align="center" width="317px" cellspacing="0px" cellpadding="1px"><tbody><tr><td><a target="_blank" rel="nofollow" href="facebook fanpage url"><img src="https://blogger.googleusercontent.com/img/b/R29vZ2xl/AVvXsEhCG-lVZmA1uWsf8MAZMIwD7rML3r3JGMFjQiFd3pcPrpHJfzWax7q8nS6tP8l2AlSLV9mL5P1zw9vzkHQjSHyRfvIxWMCh1AePtBYr-RwgUMUcVaIvoWR8wybzzRbr3lIRu4hZUHPUzH0/s1600/woden+board+facebook_netoops.png" class="beintouch" /></a></td><td><a target="_blank" href="twitter url" rel="nofollow"><img src="https://blogger.googleusercontent.com/img/b/R29vZ2xl/AVvXsEhRKSZUrKBoJ2XVq4nzMb8qYsocfCt2umvzy7hmezmyeBstcqrJBQLFqoRUYohCLkFA1hzCFHq6yGhIqXtlvK7rpo57t5d0dQUqpg-Z7p9R0mmAW3SpHOZhHqtAtzTklOMO3GO3Tyu2_yo/s1600/woden+board+twitter_netoops.png" class="beintouch" /></a></td><td><a target="_blank" href="feed burner url" rel="nofollow"><img src="https://blogger.googleusercontent.com/img/b/R29vZ2xl/AVvXsEjlTTdiD6qFZWSd8gGyAn2zGAv_yU_hV3IRS3MQcF35i29xWHQQiVPJEE7Aj_-r7r_5En4U5rPQcLfElW0q1700ER_lhemXHitBGtpU3ybRFWuAKnPvYSxKWuvSpLrpeRJVPFiurvWtZeo/s1600/woden+board+RSS1_netoops.png" class="beintouch" /></a><a href="http://netoopsblog.blogspot.com"></a></td></tr></tbody></table>
<div>Get Latest Tips via e-mail</div>
<form target="popupwindow" style="margin: 0pt;" onsubmit="window.open('http://feedburner.google.com/fb/a/mailverify?uri=feed burner id', 'popupwindow', 'scrollbars=yes,width=550,height=520');return true" method="post" class="emailform" action="http://feedburner.google.com/fb/a/mailverify">
<input type="hidden" value="NetOopsBloggerTricks" name="uri" />
<input type="hidden" value="en_US" name="loc" />
<input type="text" value="Enter your email..." onfocus="if (this.value == &quot;Enter your email...&quot;) {this.value = &quot;&quot;}" onblur="if (this.value == &quot;&quot;) {this.value = &quot;Enter your email...&quot;;}" name="email" class="emailtext" />
<input type="submit" value="Subscribe" title="" class="ebutton" alt="" />
</form>

Change the BLUE highlighted code with FACEBOOK PAGE URL, TWTTER, FEED URL, FEED ID respectively.

I think this widget helps you, Please share and like...

Wednesday, October 17, 2012

MyBloggerTricks(old Style) Template For Free Download


Mybloggertricks.com is one of the well known blog in the blogging niche running by Mohammad Mustafa Ahmedzai. Hope you have come here in search of MBT template which is well seo optimized and error free and pursue a best design. As you all know about MBT, i am not going to explain the features and customizations of MBT template. However you can kindly ask me in the comments section for any kind of customization help. I am providing Mybloggertricks template for free and the design credit goes to Mohammad bro. Please don't remove the footer attribute, All rights are strictly reserved by Mohammad Mustafa Ahmedzai. Enjoy The Template.

Get the new Version Here

  
Download Mybloggertricks template for Free

View Demo

Add Link Nudging Effect to Links and Images in Blogger


The link nudging effect have attracted huge number of bloggers and visitors in a short span. So i am writing this post to help you in implementing a link nudging effect for links and images on your blog to attract the visitors of your blog. Now lets come to the tutorial and i hope you already know what is link nudging effect!!. If not, please have a look over the demo shown below.

DEMO::
 
Demo 1 
Demo 2

Add Link Nudging Effect to Links and Images in Blogger

 1. Go to your Blogger Dashoard --> Template --> Edit Html (Tick The Expand Widget Template).

2. Find ( Ctrl+F) For ]]></b:skin> and add the following peace of code just above it.

.link-nudge {
-moz-transition: all 0.4s ease-out;
-o-transition: all 0.4s ease-out;
-webkit-transition: all 0.4s ease-out;
-ms-transition: all 0.4s ease-out;
transition: all 0.4s ease-out;
}
.link-nudge:hover  {
margin-left: 25px;
padding-left: 5px;

Custamizations

  • Change the values 25px and 5px to change the left margin of links when mouse is hovered on it.

 Adding Nudging Effect to custom link


3. To add nudging effect to a custom link, use class as Link-nudge as shown below.
<a href="Link url" class="link-nudge">Link 1</a> 
4. To add  nudging effect to a custom image, use img class as link-nudge as shown below.
<img src="img url" alt="img description" class="link-nudge"/>
To make all label links and custom links to have link nudging effect automatically, Add the following jquery code just above the ]]></b:skin>

<script src='http://ajax.googleapis.com/ajax/libs/jquery/1.6.4/jquery.min.js' type='text/javascript'>
</script>
<script type='text/javascript'>
    var dur = 400; // Duration Of Animation in Milli Seconds
    $(document).ready(function() {
        $('a.linknudge, .Label ul li a').hover(function() {
            $(this).animate({
                paddingLeft: '25px'
            }, dur);
        }, function() {
            $(this).animate({
                paddingLeft: 0
            }, dur);
        });
    }); // end of Jquery Script
</script> 

How to install blogger template 2012

In this tutorial i am going to show you how to install blogger template in the new updated version of the blogger.
just simple follow the step and install a blogger template in updated blogger interface.

1. Login to your blogger account

2. Now just select Template and you can see bellow button at the right hand side

 3. Now just click on backup / restore button and one box will pop up (you can see it in bellow snapshot)


4. Now simply browse your template and click on upload and you have done !
You can also change the arrangement of the widgets using layout.

Sunday, October 14, 2012

Customize Blogger Labels With CSS3

This label hack can be easily applied to your labels by just adding some CSS code in to your blog.Now lets see how to apply this label hack.

How To Apply This Label Hack?

Important -  Before applying this label hack set your label style to Cloud.

  1. Go to Blogger > Settings> Layouts
  2. Click add a gadget and choose Labels
  3. Inside the settings make sure to choose the cloud display. You may set other options as per your requirement. See the screenshot below as example 
labels settings

Please choose to display at most 25 labels. Too much labels on homepage look awkward. Showcase your best categories only.
4.    Now save the widget and go to settings > Template
5.    Backup your template
6.    Click Edit html > Proceed  and search for this


7.   Just above it paste the following CSS code:


8.     Save your template
 9.    All done!

 If you are getting any problem then feel free to ask it to me :)

Customize Labels Cloud in Blogger

Back in the year 2008 when Blogger.com was moving through several update phases, third party developers would often take the golden opportunity of creating widgets for BlogSpot blogs but as soon as Google rolled out massive changes to their online services, several official widgets popped out which load fast and perform well because the scripts are served by Blogger servers. Page List and label cloud/list enabled designers to create dynamic menus. Since the stylesheet was made accessible. therefore we all got a chance to play with these widgets and transform them completely in look and appearance. I must ensure you that the styles are perfectly compatible in all major browsers including IE8+.

DEMO: Look at the label CATEGORIES on the sidebar of this blog
This is how labels look in cloud display:
This is how it will look after you apply the new style.
  
The code below can be customized in several ways to create exciting label designs. You can also add background images to them.

Follow these easy steps:
  1. Go to Blogger > Settings> Layouts
  2. Click add a gadget and choose Labels
  3. Inside the settings make sure to choose the cloud display. You may set other options as per your requirement. See the screenshot below as example
Please choose to display at most 25 labels. Too much labels on homepage look awkward. Showcase your best categories only.
       4.    Now save the widget and go to settings > Template
       5.     Backup your template
       6.     Click Edit html > Proceed  and search for this


7.   Just above it paste the following CSS code:

8.  Save your template

9.    All done!

Visit your blogs and see the labels completely transformed to small neatly crafted rectangular boxes. If in case you want the label boxes to be of random sizes depending on the post-count then simply delete font-size:10px; from the above code.

Saturday, October 13, 2012

Remove Powered by Blogger from your Blogger blog (old Blogger Interface)

How do I remove the Powered by Blogger from my Blogger blog?
In order to remove you will need to edit the blogger template and delete the attribution widget.

Please see this updated post for new Blogger Interface: Remove Powered by Blogger from new interface

Please backup your blogger template before you make any changes to it. This helps to revert back to the original template when something goes wrong while editing your template. The steps for backup and restore are discussed here in detail.

Steps to remove the Powered by Blogger text from your blog:


Add a gadget in Blogger step 1
1. Go to Blogger Dashboard. Click on  Layout. Click on the Page Elements tab for your Blog.
 
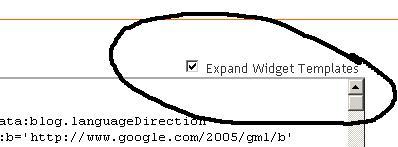
2. Click on Edit HTML and select the Expand Widget Templates checkbox.
 
Edit blogger template to Remove powered by Blogger
3. Search for Attribution widget.
 
remove_blogger_link

Remove the selected code from your blogger template carefully.
 
4. Press the Save Template Button.